Category: Recipes

  • Traditional Brazil Dishes And Recipes

    Traditional Brazil Dishes And Recipes

    Traditional Brazil Dishes And Recipes

    Embark on a gastronomic journey to Brazil, where every dish is a reflection of rich traditions and vibrant culture. Our collection of Traditional Brazilian Dishes and Recipes invites you to savor the authentic flavors that have been passed down through generations. From the bustling streets of Rio to the serene corners of Bahia, each recipe tells a story of heritage and taste. Let the captivating aromas and diverse flavors of Brazil transport you to a world of culinary delight, where every bite is a celebration of tradition and a tribute to the country’s culinary artistry.

    Main Course Recipes:

    Elevate your dining experience with our array of Main Course Recipes that take center stage on your table. From succulent meats to hearty vegetarian options, each recipe is a masterpiece in itself. Whether you’re hosting a special occasion or simply craving a satisfying meal, our collection offers a diverse range of flavors and preparations to suit every palate. Get ready to indulge in culinary excellence and create memorable moments with these main courses that are bound to leave a lasting impression. Dive into the heart of Brazilian cuisine with the iconic Feijoada, a dish that epitomizes the nation’s rich culinary heritage. Rooted in history, this hearty stew showcases the fusion of African, European, and indigenous influences that have shaped Brazil’s diverse culture.

    Dessert Recipes:

    Satisfy your sweet cravings with our irresistible collection of Dessert Recipes that promise a delightful finale to any meal. Indulge in the decadence of our Gourmet Chocolate Brigadeiro, where the rich flavors of chocolate take center stage. Elevate your dessert game with Brigadeiro adorned with creative toppings, adding an artistic twist to a classic treat. And for those seeking guilt-free indulgence, our Vegan Brigadeiro offers a luscious option that won’t compromise on flavor. Embrace the world of dessert delight as you explore these recipes, each offering a unique journey into the realm of sweetness and creativity

    Bread Recipes:

    Experience the comforting aroma and delightful textures of freshly baked goodness with our enticing Bread Recipes collection. Journey into the heart of Brazil’s baking traditions as we present the beloved Classic Pão de Queijo recipe, where cheese melds perfectly with warm dough. Elevate your bread game with Pão de Queijo’s innovative stuffed variations, adding an element of surprise to every bite. For those with dietary considerations, our Gluten-Free Pão de Queijo offers a delightful option that caters to specific needs. Join us as we celebrate the art of bread-making, offering a trio of recipes that promise to transform your kitchen into a haven of irresistible aromas and flavors.

    Beverage Recipes:

    Quench your thirst and explore the vibrant world of Brazilian flavors with our enticing Beverage Recipes. Step into tradition with the invigorating taste of the Traditional Caipirinha cocktail, where the harmonious blend of ingredients captures the essence of Brazil’s spirit. Venture into a realm of creativity with Fruit-Infused Caipirinha variations, infusing tropical fruits for a burst of freshness. For those seeking a non-alcoholic delight, our Virgin Caipirinha offers a refreshing option that delivers the same zesty allure without the spirits. Embrace the symphony of flavors that our beverage recipes bring, promising a sip of Brazil’s zest and zestiness in every glass.

    Healthy Recipes:

    Embark on a journey of well-being with our selection of Healthy Recipes designed to nourish your body and delight your taste buds. Discover the art of crafting a delicious Açaí Bowl at home, where vibrant colors meet natural goodness. Elevate your bowl with an array of wholesome Açaí Bowl toppings, adding an extra layer of nutrition to your creation. Dive into the benefits of Açaí Bowl as a cornerstone of a balanced diet, unlocking the secrets to a healthier lifestyle. Join us in embracing the fusion of taste and wellness, as we bring you recipes that nourish not only your body but also your spirit.

    Quick Snack Recipes: 

    Embrace the art of snacking with our collection of Quick Snack Recipes, offering a tantalizing journey of flavors in every bite. Delight in the authentic charm of Coxinha, a traditional Brazilian snack that embodies both crunch and tenderness. For those seeking a healthier alternative, our Baked Coxinha brings the same deliciousness with a lighter twist. Venture into creativity with a range of Coxinha fillings beyond chicken, allowing your palate to explore new dimensions of taste. Join us in celebrating the joy of snacking, where every recipe promises a burst of satisfaction and an exploration of Brazil’s culinary treasures. 

    Grilling Recipes:

    Ignite the flames of culinary excitement with our sizzling array of Grilling Recipes, designed to elevate your barbecue game to new heights. Immerse yourself in the heart of Brazil with our Authentic Brazilian Churrasco recipe, where prime cuts meet authentic marinades for a feast of flavors. Indulge in the art of Churrasco with our Marinades for Flavorful BBQ, infusing meats with a symphony of tastes that transport you to a world of barbecue bliss. For those taking their first steps, our Churrasco Grilling Tips for Beginners offer expert guidance, ensuring your grilling journey is nothing short of extraordinary.

    Soup Recipes:

    Delve into a world of warmth and comfort with our array of Soup Recipes, where each spoonful tells a tale of taste and tradition. Experience the cherished Classic Caldo Verde recipe, a Portuguese delight featuring kale and sausage that resonates with generations. Venture into creativity with Caldo Verde variations, exploring the lush spectrum of greens that infuse new life into this beloved dish. Embrace the wellness journey with Caldo Verde as a healthy meal option, where nourishment and flavor harmonize beautifully.

  • Traditional Caipirinha Cocktail Recipe

    Traditional Caipirinha Cocktail Recipe

    Healthy Recipes For Delicious Açaí Bowl

    In the realm of nourishing and delightful culinary creations, Açaí Bowls stand as a shining example of how taste and well-being can coexist harmoniously. This trio of recipes and insights invites you into a world where wholesome indulgence and nutritional goodness intertwine seamlessly. As you embark on this exploration of Açaí Bowls, prepare to immerse yourself in a realm where deliciousness and nourishment intertwine effortlessly. Whether you’re blending a base, arranging toppings, or embracing the holistic benefits, these recipes and insights inspire you to embrace a culinary journey that not only pleases your palate but also enriches your overall nutritional intake.

    How To Make A Delicious Açaí Bowl At Home?

    Ingredients:

    • Pure unsweetened acai puree
    • Strawberries
    • Banana
    • Milk 
    • Yogurt

    Method:

    • Start by slicing a ripe banana and placing it on a small baking sheet or plate lined with parchment paper. Add blueberries and strawberries to the same plate. Store-bought frozen fruit can also be used. Place the tray or plate in the freezer and allow the fruit to freeze completely.
    • Once the fruit is frozen, you’ll need a large, high-speed blender with a tamper. To the blender’s bowl, add milk and yogurt. Then add the frozen blueberries, strawberries, frozen banana slices, and broken-up açaí. Turn the blender on low, and use the tamper to push the frozen fruit down, ensuring everything mixes thoroughly. Only add additional liquid if necessary, keeping the blend thick and creamy.
    • Divide the smoothie mixture evenly into two bowls. 
    • To fully relish the flavors and textures, it’s best to enjoy your Açaí Bowl immediately after assembling. The contrast between the creamy base and the crunchy toppings is a delightful experience that you won’t want to miss.
    best Vegemite recipe

    Açaí Bowl Toppings For Extra Goodness

    Transforming an ordinary Açaí Bowl into an exceptional culinary creation involves the interplay of both its base and toppings. The addition of thoughtfully selected toppings not only enriches the taste and consistency but also enhances the nutritional profile of this naturally nourishing indulgence. Visualize a canvas of velvety Açaí, adorned with an assortment of vibrant hues and diverse textures, promising a symphony of harmonious flavors with every spoonful. From crispy to chewy, saccharine to tangy, each topping uniquely contributes to crafting a well-rounded and gratifying encounter that caters to both the senses and the well-being of the body.In the upcoming exploration, we embark on a journey through a range of toppings, each offering its distinct character to the tapestry of the Açaí Bowl experience.

    Ingredients:

    • Pure un sweetened acai puree
    • Strawberries
    • Banana
    • Milk 
    • Yogurt
    •  Granola
    •  nuts, seeds, sliced fruits, and even a drizzle of honey or agave syrup for sweetness.

    Method:

    • Start by slicing a ripe banana and placing it on a small baking sheet or plate lined with parchment paper. Add blueberries and strawberries to the same plate. Store-bought frozen fruit can also be used. Place the tray or plate in the freezer and allow the fruit to freeze completely.
    • Once the fruit is frozen, you’ll need a large, high-speed blender with a tamper. To the blender’s bowl, add milk and yogurt. Then add the frozen blueberries, strawberries, frozen banana slices, and broken-up açaí. Turn the blender on low, and use the tamper to push the frozen fruit down, ensuring everything mixes thoroughly. Only add additional liquid if necessary, keeping the blend thick and creamy.
    • Divide the smoothie mixture evenly into two bowls. Now comes the fun part—topping your Açaí Bowl! Use your favorite toppings, such as granola, nuts, seeds, sliced fruits, and even a drizzle of honey or agave syrup for sweetness.
    • To fully relish the flavors and textures, it’s best to enjoy your Açaí Bowl immediately after assembling. The contrast between the creamy base and the crunchy toppings is a delightful experience that you won’t want to miss.

    Benefits Of Açaí Bowl For A Balanced Diet

    Embracing an Açaí Bowl in your diet not only treats your taste buds to a delicious tropical delight but also contributes to a well-rounded and balanced nutritional intake. Packed with an array of nutrients, antioxidants, and wholesome ingredients, Açaí Bowls offer a myriad of benefits that align with a health-conscious lifestyle.

    Rich in Antioxidants:

    Açaí berries stand out for their remarkable antioxidant content, which effectively counteracts oxidative stress and promotes overall cellular well-being. These antioxidants are pivotal in safeguarding your body against the detrimental impacts of free radicals.

    Nutrient-Dense Superfood:

    Açaí is a nutritional dynamo, furnishing vital nutrients like fiber, vitamins (particularly vitamin C), and essential minerals such as potassium and calcium. This nutrient amalgamation contributes to a range of bodily functions, spanning from fortifying the immune system to promoting robust bone health.

    Heart-Healthy Fats:

    Incorporating wholesome fats from sources like nuts, seeds, and nut butters introduces a supply of monounsaturated and polyunsaturated fats. Renowned for their cardiovascular benefits, these fats enhance cholesterol levels and provide support for heart health and overall cardiovascular function.

    Customizable and Balanced:

    Açaí Bowls offer a canvas for creativity with diverse topping choices. This adaptability enables personalization to align with dietary preferences and distinct nutritional requirements.

    Skin Health Support:

    Açaí’s antioxidants potentially enhance skin health by defending against oxidative stress and fostering the regeneration of skin cells, which could contribute to a more vibrant complexion.

    Hydration and Refreshment:

    The substantial water content in fruits combined with the usage of liquids like almond milk ensures optimal hydration. As a result, Açaí Bowls emerge as a refreshing selection, particularly suitable for staying cool on warmer days.

    Weight Management:

    The synergy of dietary fiber, healthy fats, and nutrient density culminates in a gratifying meal. This combination aids in portion control and the management of cravings, potentially assisting in weight management efforts.

    Conclusion:

    In conclusion, these three elements weave together to offer a holistic approach to enjoying the vibrant and nourishing world of Açaí Bowls. By combining the art of preparation, the creativity of toppings, and the wisdom of nutrition, Açaí Bowls become more than just a meal—they become a celebration of taste, health, and personal expression. Whether you’re crafting a bowl from scratch, adorning it with a symphony of toppings, or embracing its benefits as part of a balanced diet, each element invites you to embark on a journey that enriches your culinary experience while nurturing your well-being. Embrace the vitality of Açaí Bowls and discover the harmony they bring to your quest for wholesome living.

  • Healthy Recipes For Delicious Açaí Bowl

    Healthy Recipes For Delicious Açaí Bowl

    Beverage Recipes – Traditional Caipirinha Cocktail Recipe

    In the realm of beverage alchemy, where flavors and traditions meld to create liquid delights, few concoctions stand as emblematic as the Caipirinha. Originating from the vibrant streets of Brazil, this cocktail captures the very essence of the nation’s zest for life and celebration. In this collection of Caipirinha recipes, we invite you to explore the multifaceted world of this iconic drink Traditional Caipirinha cocktail recipe, Fruit-infused Caipirinha variations, Virgin Caipirinha for non-alcoholic option, from its traditional roots to creative twists that cater to varying preferences.

    Traditional Caipirinha Cocktail Recipe

    Nestled within the heart of Brazilian culture is a cocktail that encapsulates the spirit of the nation—introducing the timeless Caipirinha. With its origins tracing back to sugarcane plantations and vibrant street parties, this iconic concoction has become a beloved emblem of Brazil’s zest for life. At first glance, the Caipirinha’s simplicity may deceive, but within its humble ingredients lies an explosion of flavor and tradition. The recipe centers around cachaça, distinct Brazilian rum derived from sugarcane, that forms the backbone of this invigorating libation.

    Ingredients:

    • Cachaça 
    • Lime
    • granulated sugar
    • Ice cubes
    • Lime slices 

    Method:

    • Wash the lime thoroughly, trim the ends, and cut it into eight wedges. Remove the white pith from each wedge to prevent bitterness.
    • Put lime wedges in a sturdy glass and sprinkle granulated sugar over them.
    • Gently twist and press lime wedges and sugar using a muddler or the back of a spoon. This releases essential oils and juices, blending with the sugar.
    • Fill the glass with ice cubes, leaving some space at the top. Pour in cachaça, the distinctive Brazilian sugarcane rum crucial to the Caipirinha’s flavor.
    • Using a stirrer or spoon, gently mix the contents for harmonious flavors. Optionally, give it a quick shake for a lighter taste. Garnish with extra lime slices for visual appeal and added citrus aroma.
    • Your Caipirinha is complete. Enjoy the traditional cocktail’s interplay of tangy lime, sugar’s sweetness, and cachaça’s earthiness.
    • Savor each sip responsibly, appreciating the delightful combination. Remember, responsible enjoyment is key.
    best Vegemite recipe

    Fruit-Infused Caipirinha Variations

    Elevate the classic Caipirinha to new heights by infusing it with the natural sweetness and vibrant colors of fresh fruits. These creative variations add a delightful twist to the traditional recipe, offering a refreshing and flavorful experience that’s perfect for any occasion. Savor these fruit-infused Caipirinha variations, each offering a unique burst of natural flavors that complement the traditional recipe’s spirit. These refreshing adaptations celebrate the diversity of tastes and the joy of experimentation, all while paying homage to the classic Brazilian cocktail. Remember to enjoy responsibly and share these delightful concoctions with friends and loved ones. Cheers to creativity in cocktails!

    Strawberry Caipirinha:

    Ingredients:

    • Cachaça
    • lime
    • granulated sugar
    • fresh strawberries
    • Ice cubes

    Method:

    • Wash, cut, and remove pith from the lime, following tradition.
    • Wash, hull, and slice strawberries into small pieces.
    • In the glass, muddle lime wedges, sugar, and sliced strawberries for flavor release.
    • Drop ice cubes, then pour in cachaça.
    • Use a stirrer or spoon to gently stir ingredients.
    • Add a strawberry slice or lime wheel garnish.
    • Relish the vibrant strawberry sweetness in your Caipirinha

    Pineapple-Mint Caipirinha:

    Ingredients:

    • Cachaça
    • lime
    • granulated sugar
    • Fresh pineapple 
    • Fresh mint leaves
    • Ice cubes

    Method:

    • Wash, cut, and remove pith from the lime, following tradition.
    • Wash, hull, and slice pineappleinto small pieces.
    • In the glass, muddle lime wedges, sugar, and sliced pineapplefor flavor release.
    • Drop ice cubes, then pour in cachaça.
    • Use a stirrer or spoon to gently blend ingredients.
    • Add a pineappleslice or lime wheel garnish.
    • Relish the vibrant pineapplesweetness in your Caipirinha


    Virgin Caipirinha For Non-Alcoholic Option

    For those seeking the vibrant flavors of a Caipirinha without the alcohol, the Virgin Caipirinha provides a perfect solution. This refreshing and zesty mocktail captures the essence of the classic Brazilian cocktail while remaining alcohol-free.The Virgin Caipirinha serves as a testament to the fact that a vibrant and enjoyable drink doesn’t require alcohol. Its invigorating flavors and vibrant presentation make it an excellent choice for those who want to savor the taste of Brazil in a non-alcoholic form. Cheers to a refreshing and lively mocktail experience!

    Ingredients:

    • lime
    • granulated sugar
    • Club soda or sparkling water
    • Ice cubes
    • Lime slices 

    Method:

    • Wash the lime thoroughly.
    • Cut off the ends and slice it into eight wedges.
    • Remove the white pith from the center of each wedge.
    • Place lime wedges into a glass.
    • Sprinkle granulated sugar over the lime.
    • Gently muddle lime wedges and sugar using a muddler or back of a spoon.
    • This releases essential oils and juices for a flavorful base.
    • Fill the glass with ice cubes, nearly to the top.
    • Pour in club soda or sparkling water to fill the glass.
    • Use a cocktail stirrer or long spoon to gently mix the contents.
    • Ensure flavors meld evenly.
    • Complete your Virgin Caipirinha with lime slices and fresh mint leaves.
    • This enhances both aesthetics and aroma.
    • Take a moment to relish the tangy refreshment of the Virgin Caipirinha.
    • It captures the classic cocktail essence, providing a delightful alcohol-free choice.

    Conclusion:

    In conclusion, these three captivating variations of the Caipirinha cocktail invite us on a journey through Brazil’s rich and diverse flavors, offering something for every palate and occasion. Whether you’re embracing the traditional recipe’s intoxicating simplicity, experimenting with the colorful array of fruit-infused variations, or opting for the alcohol-free option, the Caipirinha showcases Brazil’s gift for crafting beverages that embody the essence of life itself. From its humble beginnings to its worldwide acclaim, this cocktail transcends the glass to become a symbol of celebration, unity, and the unyielding spirit of Brazil. So, whether you’re sipping by the beach, in the heart of a bustling city, or simply in the comfort of your own home, raise your glass to the exhilarating world of Brazilian mixology. Saúde!

  • Vegemite Recipes

    Vegemite Recipes

    Vegemite Recipes

    Unlock the culinary wonders of Vegemite with these irresistible recipes like cheese and vegemite scrolls, vegemite scrambled egg, vegemite and avocado toast that showcase the versatility and unique flavor of this Australian classic. Discover the endless possibilities that Vegemite brings to your kitchen. From indulgent baked treats to hearty breakfast delights, each recipe showcases the distinct umami flavor that has made Vegemite an iconic Australian favorite. Elevate your culinary repertoire and savor the magic of Vegemite.

    Cheese And Vegemite Scrolls Recipe

    A fixture in Australian homes, Vegemite is a yeast extract spread celebrated for its robust, umami-laden taste.Mild creaminess melds seamlessly with Vegemite’s boldness, forging an appealing, balanced delight for diverse palate .Scrolls, beloved baked goods, involve dough enveloping delectable fillings. A play of textures—from flaky crust to savory, gooey center.Snack, starter, or swift breakfast, scrolls morph effortlessly, expanding your culinary horizons

    Are you looking for something very delicious snacks for tea party so the vegemite scrolls recipe are one of best option for snack as they are good combination of cheese with vegemite.

    Ingredients:

    • Unsalted butter (80)
    • Cups self-rising   flour ( 2/12)
    • Cup of milk (1)
    • Vegemite (1/4)
    • Cheese, grated
    • Freshly chopped parsley (1 tablespoon)

    Method:

    • First pre heat your oven to 200 degree centigrade
    • Add self-rising flour and butter in bowl and gently mix them 
    • Make a well in center and slowly add milk to make soft dough
    • After mixing, take arrest to dough for 20 min until gets  dough smooth
    • Roll out the dough and gently spread the vegemite over the dough
    • Sprinkle the cheese and chopped parsley over the vegemite.
    • After spreading all the sizzling close the filling and   cut the scrolls 2-4 cm and give a rest for a while. then put in baking tray and baked for 15 mins 
    • Until the scrolls are cooked 
    • Allow the scrolls to cool before serving and enjoy your meal with amazing dips as is
    best Vegemite recipe

    Vegemite Scrambled Eggs

    Vegemite, a concentrated yeast extract spread, renowned for its potent umami, imparts depth and sophistication with just a touch .A cherished Australian pantry essential, Vegemite graces toast and pastries with its iconic presence. Scrambled eggs, a versatile base, embrace a myriad of flavors. Vegemite introduces a distinctive facet to this timeless dish. Creamy scrambled eggs’ smoothness harmonizes gracefully with Vegemite’s robust, savory notes, creating a symphony of contrasts.

    Vegemite scrambled egg add a twist into your daily breakfast routine .Below mention ingredients will make delicious vegemite scrambled eggs

    Ingredients:

    • large eggs(4)
    • tablespoons milk(2)
    •  tablespoon butter(1)
    •  teaspoon Vegemite(1/2)

    Method

    • mix milk and egg together until it well emerged
    • melt a butter in nonstick pan over low-medium flame
    • add the mixture of egg into the pan and let cook until you get desirable consistency 
    • add vegemite into pan let it cook
    • drizzle with black pepper according to your taste
    • Serve these hot eggs with your favorite breakfast side (white and brown bread).

    Vegemite And Avocado Toast:

    Vegemite and avocado toast signifies a delightful blend of Australian and international gastronomic elements. Merging Vegemite’s  umami richness with avocado’s creamy decadence results in a harmonious and healthful choice for breakfast or a snack.

    Avocado toast has become famous brunch’s menu but its flavors can be enhanced by adding vegemite. Vegemite’s distinct umami flavor and the creamy avocado make for an incredibly filling and healthy dinner Below mention ingredient will make delicious

    Ingredients:

    • Fresh bread(2slice) 
    • Vegemite(1 teaspoon)
    • lemon juice
    • Salt and pepper 
    • Extra  toppings: sliced tomatoes, capsicum

    Method

    1. Toast the bread slices 
    2. Then add half ripe avocado into the bowl by using fork until it get smooth
    3. Add Vegemite, lemon juice, salt, and pepper into the mashed avocado
    4. Mix until it get fully combined 
    5. Spread this mixture on the bread evenly
    6. Season with your favorite topping such as tomato, capsicum.
    7. Serve this toasted bread in your beaky ,dinner 

    Bringing Vegemite into your culinary world get you delicious and meaningful variations .Give these recipes a try and try the umami taste which made vegemite and Australian icon.

    Conclusion:

    In conclusion, the world of Vegemite recipes invites you to explore a captivating fusion of flavors and creativity. These three recipes showcase the versatile nature of this iconic spread, adding a   touch of Australian charm to your culinary adventures. These recipes celebrate the essence of Vegemite, inviting you to savor the unique umami taste and embrace the nutritional prowess it brings to every dish. Whether it’s a morning pick-me-up or a satisfying snack, Vegemite offers a truly exceptional culinary experience.

  • Tim Tam Dessert Ideas

    Tim Tam Dessert Ideas

    Tim Tam Dessert Ideas

    Embark on a journey of indulgence with the delectable world of Tim Tam desserts. Tim Tams, those iconic Australian chocolate biscuits, have captured hearts worldwide with their rich layers and irresistible flavors. Now, let’s explore three imaginative ways to elevate the Tim Tam experience with tim tam slam, Tim tam cake, Tim tam milkshake. These Tim Tam dessert ideas redefine the way we experience these beloved biscuits, weaving tradition with innovation to create unforgettable treats.

    The Tim Tam Slam:

    The Tim Tam, a renowned chocolate-coated biscuit crafted by Arnott’s Biscuits, stands as an iconic delicacy in Australia, cherished globally. Comprising two layers of chocolate malted biscuit embracing a creamy chocolate filling, all encased in a velvety milk chocolate coat. The Tim Tam Slam embodies a communal act of savoring a Tim Tam with a steaming beverage. By “slamming” the Tim Tam into the hot drink and using it as a conduit, the biscuit undergoes a magical metamorphosis, absorbing the drink’s essence and yielding a softened, flavor-infused delight. The Tim Tam slam presents a playful and engaging way to relish your favorite biscuit. Follow these steps to embark on the ultimate Tim Tam journey:

    Ingredients :

    • Hot beverages( coffee or tea)
    • Tim tam biscuits

    Method:

    • Prepare a steaming cup of your favored hot beverage, whether it be coffee, tea, or hot chocolate.
    • Carefully nibble off the diagonal corners of the Tim Tam, unveiling a small aperture at each end.
    • Utilize one end of the Tim Tam as a makeshift straw, dipping it into your heated beverage.
    • With a finger poised over the opposite aperture, gently draw the hot liquid through the Tim Tam, allowing it to permeate the biscuit with its essence.
    • Just as the Tim Tam commences melting in your mouth, take a bite and relish the divine amalgamation of warm liquid and chocolaty bliss.
    Tim Tam Dessert Ideas

    Tim Tam Cake:

    The Tim Tam, an esteemed chocolate-coated biscuit, enjoys fervor in Australia and worldwide acclaim. With its distinctive chocolate biscuit and velvety chocolate filling, Tim Tams epitomize flavor and texture balance. The Tim Tam cake translates biscuit charm into a sumptuous cake, merging their flavors and textures with cake layers and frosting opulence. The cake reveres Tim Tams’ abiding allure, honoring their integral role in Australian heritage.

    For those seeking to impress their guests with a show-stopping dessert, the extravagant Tim Tam cake is an ideal choice. Adhere to this recipe to craft a masterpiece that will leave everyone awe-inspired:

    Ingredients:

    • Tim Tams (2 packets)
    • heavy cream( 2 cups)
    • caster sugar(1/2)
    • vanilla essence(1/2 teaspoon)
    • Chocolate sauce for drizzling

    Method:

    • Initiate by whipping together the heavy cream, powdered sugar and vanilla extract until achieving soft peaks.
    • Crush one packet of Tim Tams into fine crumbs, setting aside a few for garnishing.
    • Gently incorporate the Tim Tam crumbs into the whipped cream mixture, ensuring an even amalgamation.
    • In a cake tin or serving dish, alternate layers of the Tim Tams and the cream mixture until all components are utilized.
    • Conclude with a top layer of whipped cream and adorn it with the reserved Tim Tams, either crushed or whole.
    • Enhance the cake’s allure by drizzling it with chocolate sauce, adding an extra layer of opulence.
    • Allow the cake to refrigerate for a minimum of two hours before serving, permitting it to set and the flavors to harmonize.

    Tim Tam Milkshake:

    Tim Tams, esteemed chocolate-coated biscuits, enjoy a distinct position in Australian culture, extending their fame globally.Layers of chocolate biscuit, a velvety center, and a chocolate coat intertwine in Tim Tams, crafting a delightful symphony of textures and flavors.The Tim Tam milkshake artfully melds biscuit essence with milkshake indulgence, yielding a sumptuous drink that tantalizes taste buds and gratifies senses.The milkshake pays tribute to the timeless allure of Tim Tams, commemorating their role as a cherished cultural icon.

    Combat the scorching summer heat with a refreshing and velvety Tim Tam milkshake. This uncomplicated yet delightful recipe will transport your palate to a realm of dessert bliss:

    Ingredients:

    • Tim Tams( 4 pack)
    • vanilla ice cream( 2 cup)
    • milk( 1 cup)
    • Extra topping: Whipped cream for topping
    • Chocolate shavings for garnish

    Method:

    • In a blender, combine the Tim Tams, vanilla ice cream, and milk.
    • Blend the mixture until achieving a smooth and creamy consistency, ensuring the absence of sizable Tim Tam fragments.
    • Pour the milkshake into tall glasses and crown it with an ample layer of whipped cream.
    • Embellish the whipped cream with delicate chocolate shavings, imparting a touch of elegance.
    • Insert a whole Tim Tam into each milkshake glass, adding an element of delightful surprise.
    • Serve promptly and relish the lush Tim Tam essence, seamlessly melded with the cool creaminess of the milkshake.

    Conclusion:

    In summary, the world of Tim Tam desserts unveils a realm of indulgence that captivates the senses and redefines the art of dessert creation. These three imaginative ideas embrace the iconic Tim Tam in unique ways, crafting experiences that are truly extraordinary With these dessert ideas, the iconic Tim Tam takes center stage, adding a touch of luxury and innovation to your culinary repertoire. From the interactive fun of the Tim Tam slam to the elegance of the Tim Tam cake and the sheer indulgence of the Tim Tam milkshake, each creation embraces the essence of Tim Tam, inviting you to explore its endless possibilities.

  • Pavlova Variations

    Pavlova Variations

    Pavlova Variations

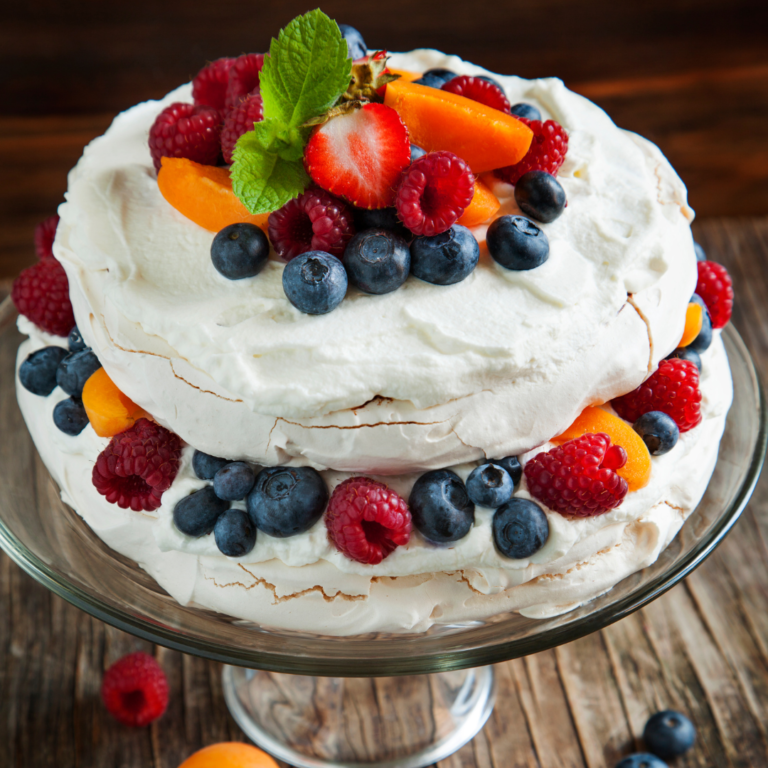
    Pavlova, a delectable dessert with a captivating visual allure, finds its origins entwined in the ongoing debate between Australia and New Zealand. This confection has earned widespread international acclaim owing to its distinctive combination of a crisp meringue exterior and a tender, marshmallow-like interior. Immortalized with the name of the renowned Russian ballerina, Anna Pavlova, this dessert is a testament to the artful marriage of textures and flavors. In this article, we will explore three enticing Pavlova variations: Mini Pavlovas, Vegan Pavlova, and Tropical Fruit Pavlova, each offering a unique twist on the traditional recipe.

    Mini Pavlovas

    Mini Pavlova, a captivating and refined dessert, finds its roots in the heartlands of Australia and New Zealand. Paying homage to the iconic Russian ballerina Anna Pavlova, this exquisite treat reflects the aspiration of its inventor to encapsulate the ethereal grace and delicacy that define the art of dance.Hailing from the southern hemisphere, Mini Pavlova embodies a harmonious fusion of textures and flavors, transforming simple ingredients into a masterpiece that delights the senses. The dessert’s foundation is crafted from crisp yet tender meringue, offering a delicate crunch that gives way to a cloud-like interior. This juxtaposition of textures mirrors the interplay of strength and gentleness that dance portrays on stage.

    Ingredients:

    • Eggs(4)
    • Salt
    • Caster sugar(1 cup)
    • Corn flour( 1 table spoon)
    • Verjuice(1 tablespoon)
    • Thickened cream(3/4cup)
    • Cream fraiche (3/4)

    Method:

    • Preheat fan-forced oven to 120°C.
    • Whisk egg whites, salt until medium-soft peaks form. Gradually add sugar, corn flour, Verjuice. Whisk until combined.
    • Line and grease two 30cm x 15cm baking trays.
    • Divide meringue into 8 portions, place 4 on each tray. Create center indentations.
    • Bake meringues at 110°C for 40 minutes. Cool in slightly open oven.
    • Whip cream, fold in crème fraiche. Chill.
    • Top mini pavlovas with cream mixture, fresh fruit, jam, or compote.
    best Pavlova Variations recipes

    Vegan Pavlova:

    Vegan Pavlova is a creative adaptation of the classic Pavlova dessert, designed to cater to individuals following a vegan diet or those who avoid dairy and eggs. The traditional Pavlova features a meringue base made from egg whites and sugar, which presents a challenge for those  seeking plant-based alternatives.In response to this, vegan culinary innovation has led to the development of egg-free meringue solutions. Aquafaba, the viscous liquid obtained from cooking chickpeas, has gained prominence as a key ingredient. When whipped, aquafaba mimics the texture and structure of egg whites, forming stiff peaks that can be used to create meringue-like bases for vegan desserts. Coconut cream crowns the melody, mimicking creamy finales. Adorned with vibrant fruits and vegan embellishments, it’s a cruelty-free encore of taste and texture.

    Ingredients:

    • coconut cream(400ml)
    • can chickpeas(400g)
    • caster sugar(1 cup)
    • corn flour(1 tablespoon)
    • maple syrup(1 tablespoon)
    • vanilla essence(1 tablespoon)
    • Pistachios and crushed coconut

    Method:

    • Transform coconut cream into a chilled delight by refrigerating overnight. Let chickpeas relinquish their liquid; save it. Chickpeas rest in a container for later. Freeze the liquid for 2 hours until cold.
    • Awaken the oven to 150°C and drape baking trays with parchment. Once liquid’s frigid, escort it to a stand mixer with the whisk attachment. An 8-minute waltz yields soft peaks. Sugar joins, a tablespoon’s tale at a time, entwined for 15 minutes until harmony is found.
    • Cornflour adds its flair. With about ¼ cup charm, 12 meringue rounds emerge on the parchment stage. Oven curtains rise at 100°C, a 1-hour 15-minute act ensues, sculpting crisp meringue. Lights dim, a 4-hour intermission or an overnight slumber follows.
    • A new dawn, coconut cream enters the stage, cool and collected in the whisk’s embrace. Vanilla and maple syrup join the dance. The coconut troupe coats the meringue canvas. Pistachios, coconut flakes, and edible blooms scatter like applause.

    Tropical Fruit Pavlova:

    Tropical Fruit Pavlova is a delightful variation of the classic Pavlova dessert, infused with the exotic flavors of tropical fruits. This captivating twist adds a burst of vibrant colors and fruity aromas to the beloved dessert, offering a taste of paradise on a plate.Tropical Fruit Pavlova captures the essence of a sun-soaked getaway, allowing dessert enthusiasts to experience the lush allure of tropical fruits no matter where they are. This innovative adaptation celebrates the enchanting world of fruits and showcases the culinary versatility of the Pavlova, making it a true feast for the senses.A paradise-infused delight. 

    Ingredients:

    • Eggs (5 )
    • Caster sugar(250g)
    • Double cream(500ml)
    • Icing sugar (2 tablespoon)
    • Fruity mango(100g)
    • Diced mango(2)
    • Papaya diced(1 )
    • Lemon juice


    Method:

    • Preheat oven to 100°C (gas mark ¼). Whisk egg whites to soft peaks, add half the caster sugar. Gradually add remaining sugar, whisk for 2 more minutes until stiff and glossy.
    • Line 3 baking trays with parchment. Spread a third of meringue on each, form 22cm circles. Bake 1½ hours, rotating trays every 30 mins. Turn off oven, cool overnight.
    • Whip cream, vanilla seeds, and icing sugar to soft peaks. Fold in coulis. Mix diced fruit and lime juice separately.
    • Before serving, assemble: Cream on plate, meringue, cream, fruit, repeat layers, end with fresh fruit.
    • Dive into the pavlova realm, spanning from classic elegance to innovative twists. With options to satisfy both traditionalists and adventurous palates, these variations promise a feast for your senses. When the desire for a visually exquisite and delectable dessert strikes, these delightful pavlova creations await your exploration.

    Conclusion:

    In conclusion, Pavlova’s versatility lends itself to a world of culinary creativity, allowing for the exploration of different tastes, textures, and dietary needs. Whether you prefer the daintiness of Mini Pavlovas, the inclusivity of a Vegan Pavlova, or the exoticism of a Tropical Fruit Pavlova, these variations offer a delectable journey through flavors and cultures. So, whether you’re a seasoned dessert enthusiast or a curious cook, these Pavlova variations invite you to savor the joy of innovation and the art of dessert making.

  • Lamington Cake Recipes

    Lamington Cake Recipes

    Lamington Cake Recipes

    Step into the world of Lamington cake recipes, where culinary creativity meets the beloved flavors of this iconic Australian treat. With its origins deeply rooted in tradition, the Lamington has evolved into a canvas for innovation, giving rise to a medley of delightful variations. Here, we present three enchanting recipes lamington trifles, lamington ice-cream sandwich, lamington cake pop that celebrate the essence of Lamington in unique and scrumptious ways.

    Lamington Trifles

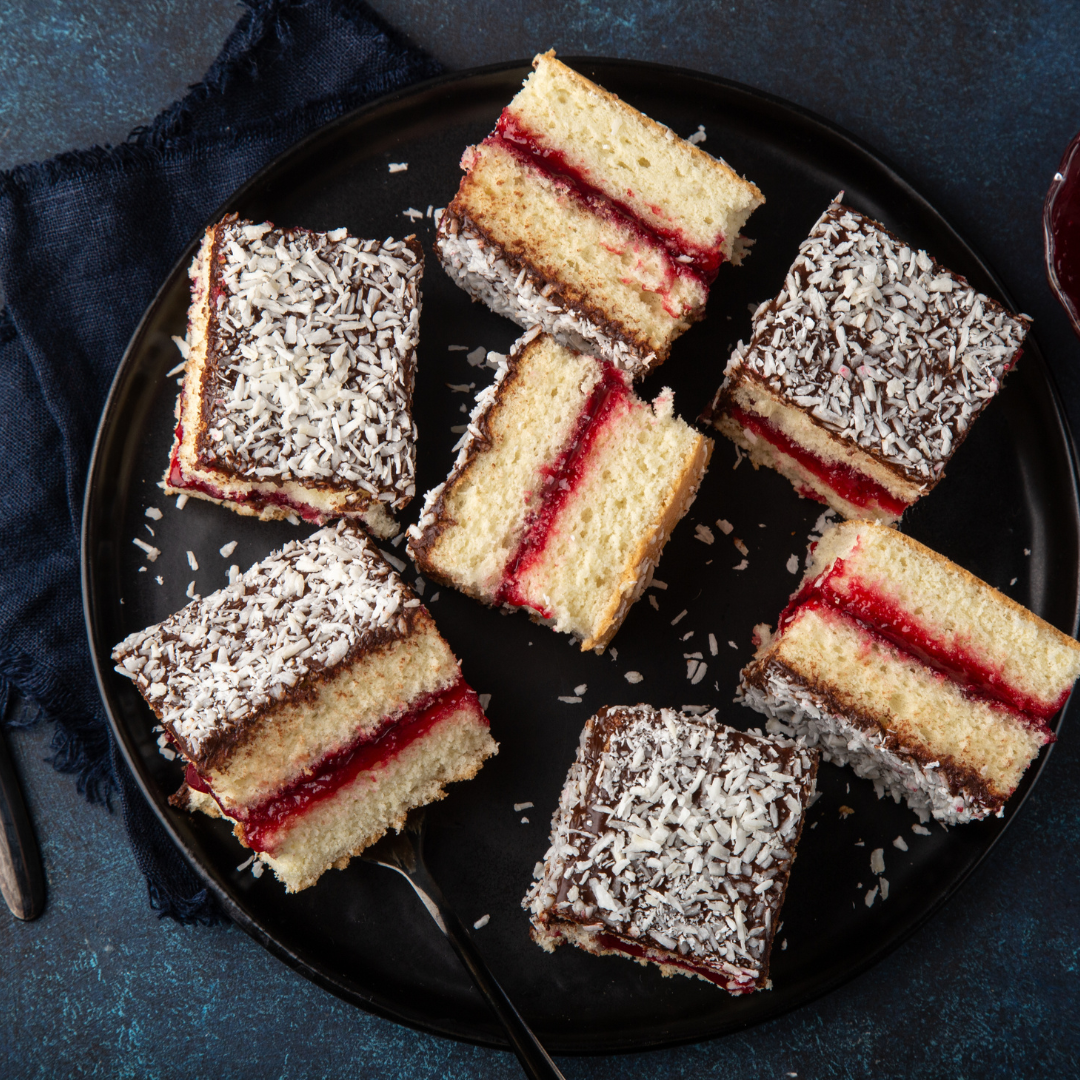
    The Lamington, an adored Australian delight, features sponge cake squares enveloped in chocolate icing and desiccated coconut. With its origin traced back to the late 1800s and often linked to Lord Lamington, Governor of Queensland, this treat emerged from a creative endeavor to revive stale sponge cake. The Lamington trifle ingeniously transforms the traditional cake, assembling its fundamental elements—sponge cake, chocolate, and coconut—into layers within a trifle dish. The outcome is an enticing, visually appealing, and sumptuous dessert.

    Elevating the essence of the timeless Lamington, the Lamington trifle emerges as an opulent and refined dessert masterpiece.

    Ingredients:

    • Plain flour (2 cups)
    • Caster sugar (1 cup)
    • Baking powder (2 tablespoon)
    • Baking soda (1/2 spoon)
    • Salt 
    • Milk (1 cup)
    • Melted butter (1/2 cup)
    • White vinegar and vanilla extract (1 tablespoon)

    Raspberry jelly:

    • Water (2 cups)
    • Raspberries (1 cup)
    • Sugar (1/2 cup)
    • Agar powder (1 tablespoon)

    Extra topping or layers:

    • Whipping cream
    • Crushed coconut (1 cup)
    • Chocolate sauce (1 jar)
    • Some fruits like strawberries

    Method:

    • First, preheat the oven and set the baking tray with baking paper.
    • Add flour, sugar, baking powder, and another dry item in a bowl and mix them. Afterward add wet items like milk, oil, and butter and mix them until it well merged.
    • Afterward, mix them transfer the batter to a baking tray, and bake for 20-30 until well cooked.
    • When the  cake is fully baked. Allow it to cool and cut them into pieces.
    • Making of jelly:
    • Mix all the ingredients and transfer your mixture into a saucepan.
    • Cook for 5 mins until it gets the consistency of jelly.
    • Now cool for the next 5 mins until it sets and pour them into the serving dish and put into the fridge.

    Making of whipping cream: 

    • Put cream into a large bowl and whip until it gets a soft consistency.

    Assembling of trifle:

    • Arrange the cake over the raspberry jelly. Add crushed coconut over the jelly. After that, drizzle half a cup of chocolate sauce and add another layer of cake and crushed coconut. Now add whipped cream and extra toppings like strawberries. Serve it and enjoy the trifle
    best Lamington Cake Recipe

    Lamington Ice Cream Sandwich

    The Lamington, a beloved Australian dessert, features sponge cake squares coated in chocolate icing and desiccated coconut.Paying homage to Lord Lamington, former Governor of Queensland, this treat has solidified its place within Australian culinary traditions.

    Enter the Cool Innovation: Lamington Ice Cream Sandwich:

    The Lamington ice cream sandwich seamlessly melds the classic Lamington components with the creamy delight of ice cream, crafting a mouthwatering dessert ideal for satisfying and cooling.

    Ingredients:

    • Lamington cake
    • Ice cream 
    • Crushed coconut  
    • Chocolate sauce

    Method:

    • Lamington meets ice cream sandwich. Beat the heat with a twist, pleasing all with a unique, luscious delight.
    • First, make a lamington cake and cut them into a circular shape with the help of a cutter.
    • Select your favorite ice cream flavor. After selecting rest the ice cream at room temperature until it gets its soft foam so that it can be easily spread.
    • Take 2 slices of cake and put ice cream in between them and gently press them.
    • To add some finesse to the sandwich, roll your sandwich over the crushed coconut and put the chocolate sauce over the sandwich.

    Lamington Cake Pops

    The Lamington, a true Australian dessert, showcases sponge cake squares enrobed in chocolate icing and desiccated coconut.Named after Lord Lamington, this treat boasts a heritage tracing back to the late 1800s.

    Embracing Innovation: Enter Lamington Cake Pops:Lamington cake pops ingeniously reshape the classic, rendering it as delightful, bite-sized treats.Cake pops’ charm lies in their portability and eye-catching allure, rendering them perfect for gatherings and celebrations.

    Ingredients:

    • Lamington cake
    • Vanilla buttercream
    • Crushed coconut  
    • Chocolate sauce

    Method:

    • Discover lamington cake pops- a playful, bite-sized take on a classic treat. Irresistibly charming, they are hit at any gathering, appealing to all ages. Below mentioned steps are making lamington cake:
    • First, bake a cake. Allow them to cool. After cooling make the cake into fine crumbs. Add some vanilla buttercream in cake crumbs to make a soft dough form 
    • Roll up the cake and other mixture and allow them to cool in the fridge 
    • Meanwhile, melt some chocolate in a pan or microwave.
    • Gently dip the cake pops into the chocolate and ensure they it fully coated 
    • After giving some rest add some extra topping to enhance the look of the cake pops like drizzling the crushed coconut into the cake pop and putting them back into the fridge.
    • Indulge in the delight of our exquisite lamington cake pop, now ready for your enjoyment. Elevate any occasion by either showcasing them on a good platter.

    Conclusion:

    In closing, the world of Lamington cake recipes offers a delightful array of treats that celebrate the beloved flavors of this iconic Australian dessert. These three recipes epitomize the versatility of Lamingtons, presenting imaginative twists on a classic favorite. With these recipes, the essence of Lamingtons takes center stage, inviting you to explore a realm of creativity and flavor. From the decadent trifle to the innovative ice cream sandwich and the playful cake pops, each dish embodies the essence of Lamingtons, capturing the heart of Australia’s culinary tradition in every delectable bite.

  • Damper Bread Recipe

    Damper Bread Recipe

    Damper Bread Recipe

    Damper bread, an enduring emblem of Australia’s culinary heritage, encapsulates a storied past and an inherent rustic allure. Hailing from the nascent days of Australian settlement, this bread flourished as a practical response to the scarcity of resources. Birthed out of necessity, damper bread’s journey spans epochs, its simplicity and open-fire preparation techniques evolving while retaining an authentic charm day, this bread serves as a versatile canvas for an array of flavors and dietary preferences, embodying the essence of adaptability without forsaking its heritage.In this, we embark on an exploration of damper bread’s diverse world, unearthing three captivating variations that enrich its storied narrative. Cheesy damper bread, Sweet damper bread, Gluten-free damper bread.

    Cheesy Damper Bread

    Indulge in the savory charm of cheesy damper bread, a harmonious fusion of rustic allure and exquisite flavors. Stemming from Australia’s campfire cookery heritage, damper bread has blossomed into a cherished global delicacy, celebrated for its adaptability and delectable essence. Born around campfires, adored across generations—cheesy damper bread’s journey from rustic necessity to cherished comfort food is a tale of enduring simplicity and irresistible taste. Join in this marriage of tradition and flavor, and relish a culinary adventure that has transcended time with its humble yet unforgettable charm.

    Ingredients:

    • plain flour(2 ½ cups)
    • baking powder(1 tablespoon)
    • bakingsoda(1 teaspoon)
    • salt
    • grated Gruyere(1 cup)
    • unsalted butter(6 tablespoons)
    • cold buttermilk(1cup)
    • Parmesan cheese, for grating
    • Accompaniments: your favorite jam or Vegemite and/or butter

    Method:

    • Blend butter and cheese into flour and salt.
    • Create a well in flour, pour in milk, and stir from center to blend evenly. Add shallots if desired.
    • Knead and roll on floured surface into a 3 cm high round.
    • Top with extra cheese and butter dots.
    • Place on greased baking tray, bake at 220°C for around 25 minutes.
    best Damper Bread Recipe

    Sweet Damper Bread:

    Sweet damper bread is a traditional Australian bush bread that’s been given a delightful twist by incorporating sweetness into its hearty, rustic texture. Damper itself is a simple type of bread that has historical roots in Australia, often associated with early settlers and travelers who relied on basic ingredients to create nourishing meals while on the go.Sweet damper bread is a versatile treat that can be enjoyed in various ways. It’s perfect for breakfast, served warm and slathered with butter or a drizzle of honey. It can also make for a satisfying snack or a unique addition to a picnic or outdoor gathering. The combination of sweetness and the rustic charm of damper bread pays homage to Australia’s culinary heritage and its connection to resourcefulness and simplicity.

    • plain flour(2 ½ cups)
    • baking powder(1 tablespoon)
    • baking soda(1 teaspoon)
    • salt
    • cold unsalted butter(6 tablespoons)
    • cold buttermilk(1 cup)
    • FOR A SWEET DAMPER –OPTION
    •  Goldensyrup or honey
    • castersugar (2 teaspoon)
    • sultana (optional)

    Method:

    • Blend butter into flour and salt.
    • Now add honey, caster sugar in milk and mix well.
    • Create a well in flour, pour in milk, and stir from center to blend evenly. Add shallots if desired.
    • Knead and roll on floured surface into a 3 cm high round.
    • Top with chocolate chips and butter dots.
    • Place on greased baking tray, bake at 220°C for around 25 minutes.

    Gluten-Free Damper Bread

    Gluten-free damper bread offers a wonderful twist on the classic Australian campfire treat, catering to those with gluten sensitivities or dietary preferences. This rustic bread maintains the essence of traditional damper while adhering to gluten-free requirements.By adhering to these steps, you’ll create a gluten-free damper bread that preserves the essence of the traditional recipe while catering to specific dietary needs. This gluten-free version ensures that individuals who require or prefer gluten-free options can partake in the joy of this iconic Australian treat.

    Ingredients:

    • Gluten free plain flour(500g)
    • Salt
    • Water(1 cup)

    Method:

    • In a mixing bowl, combine 500 grams of self-raising gluten-free flour and add a pinch of salt for flavor.
    • Slowly pour in water while stirring continuously. As you do this, you’ll notice the ingredients gradually coming together, forming larger clumps of dough.
    • Utilize a butter knife to cut through these larger clumps and keep stirring the mixture in a circular motion. Over time, the dough will begin to merge into a single cohesive piece. Because the mixture is quite sticky, there’s no need to use your hands at this stage.
    • Once the dough has combined, use the knife to transfer it onto a trivet that has been lightly dusted with flour. You can cover the trivet with foil for easy cleanup. Place the lid onto a camp oven, creating an enclosed cooking environment.
    • Employ both top and bottom heat sources for even cooking. This can be achieved by placing coals or arranging the oven over an open flame.
    • Allow the damper to cook for approximately 30 to 40 minutes. Keep an eye on the progress. The bread is ready when the top surface has turned a golden brown color and, when tapped, it produces a hollow sound in the middle.
    • Once cooked, carefully remove the damper from the oven and trivet.
    • For serving, the damper can be accompanied by your preferred spreads. A classic choice is butter and golden syrup, which perfectly complement the rustic flavors of the bread.

    Conclusion:

    In conclusion, damper bread symbolizes resilience and resourcefulness, carrying within its simple ingredients a legacy that spans generations. From its humble beginnings as a bush bread necessity to its modern-day incarnations, damper bread encapsulates the essence of Australian culinary heritage while adapting to the ever-changing gustatory landscape. As we explore the alluring avenues of Cheesy Damper Bread, Sweet Damper Bread, and Gluten-Free Damper Bread, we celebrate not just a bread, but a continuum of flavor and tradition that persists to this day.

  • Barramundi Cooking Methods

    Barramundi Cooking Methods

    Barramundi Cooking Methods

    Barramundi, a prized fish found in the waters of Australia and Southeast Asia, boasts a delicate flavor and flaky texture that make it a favorite among seafood enthusiasts. Its versatility shines through in various culinary applications, with different cooking methods enhancing its natural qualities. In this culinary exploration, we will delve into the world of Barramundi and explore three captivating cooking methods: Grilled Barramundi with Lemon and Herbs, Barramundi en Papillote, and Crispy Skin Barramundi. Each method offers a distinct way to experience the exquisite flavors of this remarkable fish.

    Barramundi Grilled With Lemon And Herbs:

    Barramundi, renowned for its gentle taste and firm texture, transforms into a culinary masterpiece when grilled alongside zesty lemon and fragrant herbs. This dish artfully highlights barramundi’s innate qualities, while harnessing the invigorating essence of lemon and the aromatic allure of herbs.Masterfully grilling the barramundi within the specified timeframe guarantees a flaky, tender texture. The marriage of fork-tender fish, crispy skin, lemony infusions, and herbaceous embellishments conjures a plate that marries exquisite taste with inviting presentation.In essence, barramundi grilled with lemon and herbs encapsulates the essence of simplicity and refinement. It lauds the intrinsic flavors of superior fish while elevating them with the vivacity of lemon and the grounding essence of herbs.

    Ingredients:

    • barramundi fillets (200 g each) 
    • olive oil(2 tablespoons)
    • lemon
    • garlic powder(1 teaspoon)
    • sliced spring onion (1/4 cup)
    • chopped fresh parsley (2 tablespoons)
    • Fresh herbs

    Method:

    • Preheat grill on high.
    • Place fish in a glass dish or on lined baking tray. 
    • Drizzle with olive oil.
    • Sprinkle lemon zest, half lemon juice, and garlic powder on fish. Lay sliced lemon on top.
    • Add spring onion and parsley over the fish.
    • Grill 15-20 minutes until fish is cooked and flakes easily.
    •  Serve with herbs.
    best Barramundi Cooking Methods

    Barramundi En Papillote

    Barramundi en papillote” is a culinary finesse originating from French cuisine that involves cooking fish within a sealed parchment paper pouch. This method beautifully highlights the unique qualities of barramundi, a fish renowned for its refined flavor and firm texture.Translating to “in parchment,” the technique revolves around crafting a tightly sealed packet to envelop the fish and its accompanying elements. This meticulous approach allows the barramundi to gently cook and meld with the flavors of the surrounding ingredients, resulting in a harmonious and flavorful dish.

    Ingredients

    • olive oil(2 tablespoon)
    •  Spanish onion( 1)
    • red capsicum
    •  garlic cloves(2)
    • dry white wine(100ml)
    • cherry tomatoes(400g)
    • thyme sprigs(3)
    • saffron threads( 1 tablespoon)
    • skinless barramundi fillets(200g)
    • olive oil
    • lemon juice

    Ingredients for Fennel salad

    • fennel bulbs, thinly sliced 
    • Spanish onion, thinly sliced
    • coarsely torn flat-leaf parsley(2tablespoon)
    • olive oil(1½ tbsp.)
    • lemon juice

    Method:

    • Preheat oven to 220°C.put oil in saucepan and heat on flame..  let fry onion, capsicum, and garlic until tender (5-6 minutes
    • Add wine, reduce by half (1-2 minutes), then add tomatoes, thyme, and saffron. Simmer until thick (2-3 minutes). Remove thyme.
    • Place 4 baking paper pieces on a surface. Divide capsicum mixture among them. Top with fish fillets, drizzle oil and lemon juice, sprinkle rind, season. Fold paper to seal parcels
    • Roast on a tray until fish cooks (12-15 minutes).
    • For fennel salad, mix drained fennel with other ingredients. Season, toss, and pile on fish. Serve with lemon wedges.

    Crispy Skin Barramundi

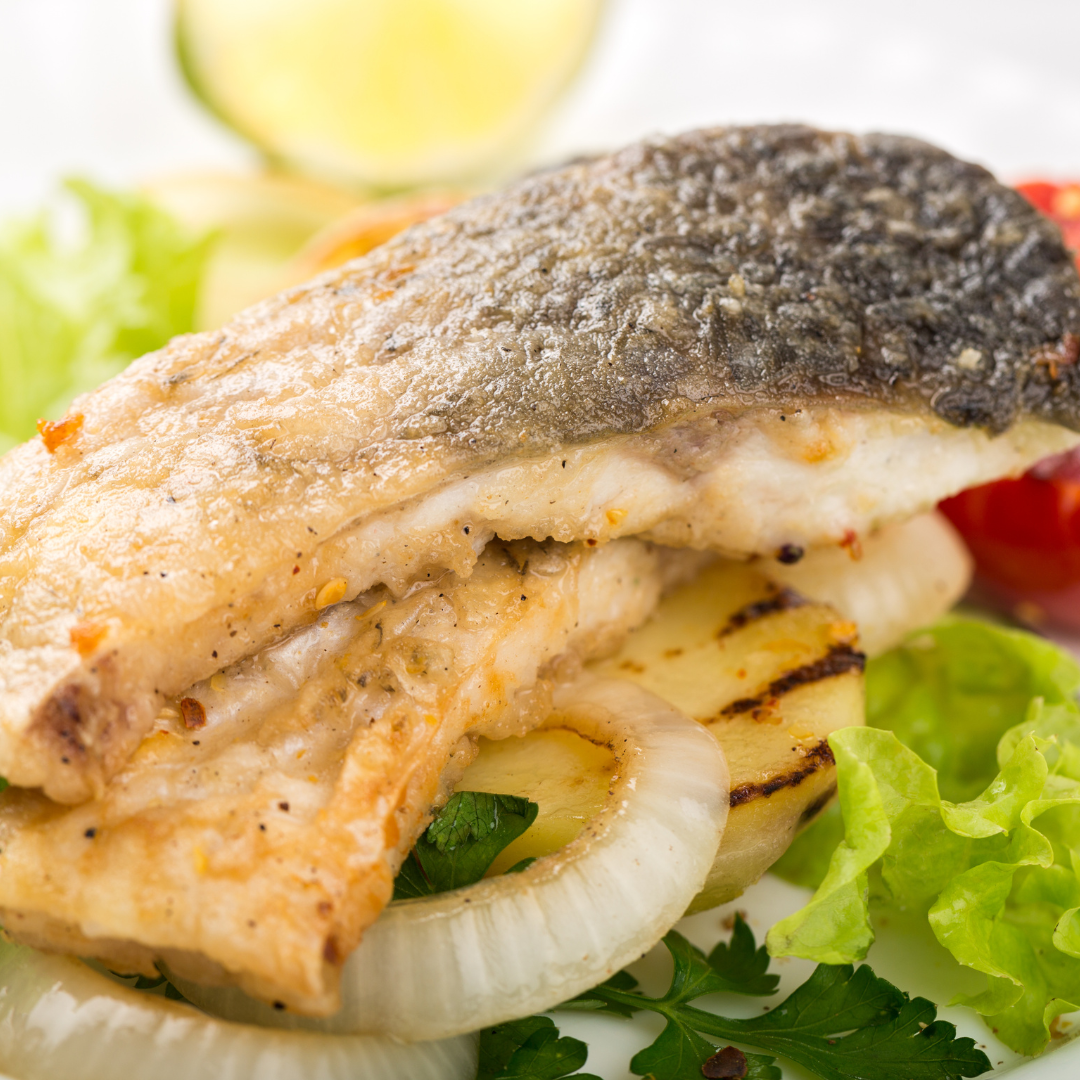
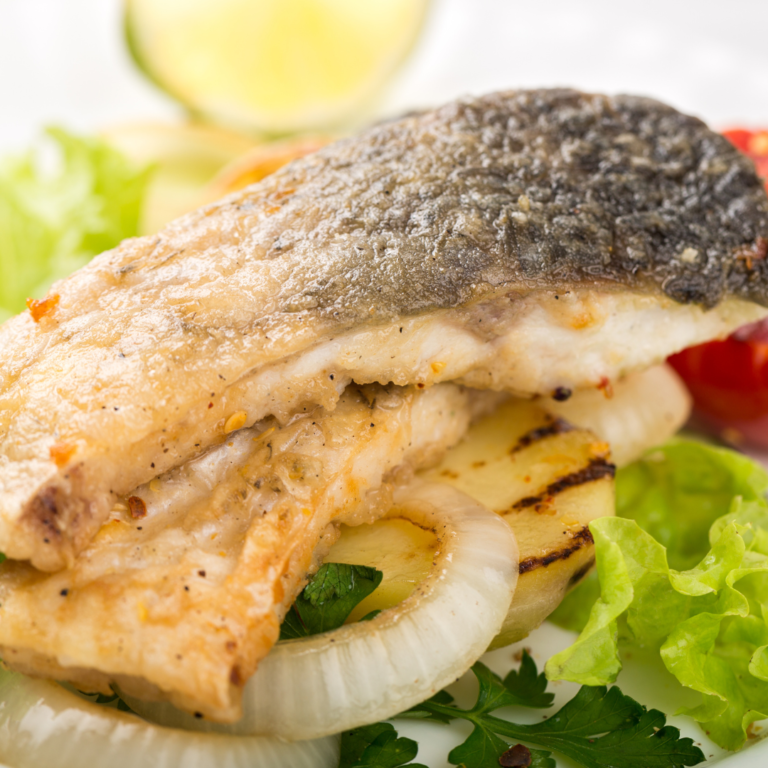
    Crispy Skin Barramundi is a culinary delight that revolves around attaining the perfect balance of a crispy exterior and moist flesh in the barramundi fish fillet. This technique hinges on meticulous preparation and accurate cooking to achieve the desired results.To execute this dish successfully, the barramundi fillet’s skin is gently scored to promote uniform crisping. Moreover, the crucial step of patting the fillet dry before cooking plays a pivotal role. By removing excess moisture, this step is essential in achieving the sought-after crisp texture.

    Ingredients:

    • barramundi fillets(4)
    • olive oil(2 tablespoon)
    • potato(6 brushed)
    • parsley leaves(1 tablespoon)
    • green beans(400g)
    • coriander seeds(1/2 tablespoon)
    • orange juice(2 tablespoon)

    method:

    • Preheat oven to 220°C with baking tray inside. Boil salted water in a pot.
    • Toss potatoes with oil, salt, and pepper. Bake 15 mins, turn, bake 10-15 mins until golden. Sprinkle parsley.
    • Boil green beans 3-4 mins till tender-crisp. Cool on tray.
    • For vinaigrette, heat oil with crushed coriander seeds for 5 mins. Strain, mix oil with orange juice. Add salt, pepper, coriander leaves, chopped orange segments.
    • Dry barramundi fillets, score skin. Season. Heat 1 tbsp oil in pan. Cook fillets skin-side down for 2-3 mins until golden.
    • Turn fillets, cook 1-2 mins until done. Rest 1 min.
    • Heat 1 tbsp oil in separate pan, cook green beans 3-4 mins. Add orange segments, season.
    • Arrange barramundi, potatoes, and green beans on plates. Drizzle vinaigrette over fish. Serve.

    Conclusion:

    In conclusion, the versatile Barramundi fish lends itself to a diverse array of cooking methods, each contributing to a unique and memorable dining experience. Whether you’re drawn to the grilled simplicity with lemon and herbs, the aromatic embrace of en papillote, or the indulgence of crispy skin, these cooking techniques invite you to explore the depth of flavor and artistry that Barramundi brings to the culinary world.


  • Australian Christmas Desserts

    Australian Christmas Desserts

    Australian Christmas Desserts

    Christmas in Australia is a time of joyful celebrations, warm gatherings, and delectable feasts. Amidst the summer heat, Australians have embraced a unique blend of traditional Christmas desserts that reflect the country’s vibrant culture and seasonal nuances. In this culinary journey, we will explore three iconic Australian Christmas desserts: Christmas Pavlova, Plum Pudding with Brandy Custard, and Chocolate Ripple Cake Trifle. These sweet delights not only tantalize the taste buds but also capture the essence of a truly Australian festive experience

    Christmas Pavlova:

    A Christmas pavlova is a delightful dessert adding elegance to holiday festivities. Named after Anna Pavlova, it features a crisp outer shell and a soft, airy inside. For the holidays, it’s adorned with seasonal fruits, berries, and festive touches. Beyond its culinary appeal, the Christmas pavlova symbolizes the holiday’s spirit of sharing and togetherness. As loved ones enjoy this dessert together, it forges enduring memories, reflecting the warmth and love of the festive season. The Christmas pavlova transforms from dessert to centerpiece, capturing the holiday table’s focus. Its stunning look and blend of flavors create an irresistible conclusion to the festive banquet.

    Ingredients:

     Making of pavlova:

    • large egg whites(6)
    • castersugar(350g)
    • white wine vinegar(1 tablespoon)
    • corn flour(1 tablespoon)

    For the filling:

    • double cream(600ml)
    • vanilla bean paste(1 tablespoon)
    • icing sugar(50g)
    • strawberries(200g)
    • raspberries(300g )
    • blueberries(200g)
    • pomegranate seeds(50g)
    • few mint leave

    Method:

    • Preheat oven to 160° Line baking sheet with parchment paper.
    • Put 6 egg whites in a mixing bowl. Use electric whisk to beat egg whites until cloud-like.
    • Gradually add sugar, whisk until stiff and glossy.
    • Mix vinegar and corn flour, gently stir.
    • Shape meringue on parchment within circles.
    • Place sheet in oven, reduce temperature to 140°C
    • Bake for 1 hour. Turn off oven, leave pavlova inside to dry.
    • Whip cream in separate bowl, add vanilla and icing sugar, whip to stiff consistency.
    • Spoon cream into meringue’s trench.
    • Arrange berries and pomegranate on cream.
    • Extra topping: add mint leaves for decoration.
    • Sprinkle with icing sugar before serving.
    best Anzac biscuit recipe

    Plum Pudding With Brandy Custard

    Plum pudding with brandy custard is an emblem of holiday tradition, merging nostalgia and culinary heritage. With origins dating back centuries, this dessert fuses rich flavors and warming spices, accompanied by a velvety custard infused with brandy essence. Emerging in medieval England, plum pudding – despite the name – lacks plums. Instead, it combines suet, dried fruits, breadcrumbs, spices, and a hint of spirits. Steaming for hours imparts depth and aroma, creating a moist, flavorful masterpiece rooted in tradition. plum pudding with brandy custard resonates with the holiday spirit of sharing. Creating this dessert involves family collaboration, from mixing ingredients to lighting its ceremonial flames. Serving and savoring it fosters togetherness and tradition. Tightly linked to the holiday, it often graces Christmas tables. Prepared with care months ahead for flavors to develop, its presentation is a pinnacle of festive celebrations, eliciting awe and anticipation.

    Ingredients:

    • Dried figs(130g)
    • Apricots(50g)
    • Mixed peel(75g)
    • Brown sugar(90g)
    • Beef suet(180g)
    • Plain flour(100g)
    • Bread crumbs(90g)
    • Orange juice
    • Lemon juice
    • Vanilla bean(1)
    • Nutmeg grated(1)
    • Eggs(2)
    • Brandy(75ml)
    • Milk(600ml)
    • Butter

    Brandy custard:

    • Thickened cream(500ml)
    • Vanilla bean(1/2)
    • Egg yolks(8)
    • Castersugar(100g)
    • Corn flour(35g)
    • Brandy(35ml)

    Method:

    • To prepare the pudding, combine all ingredients in a large bowl, cover it with plastic film, and refrigerate overnight. Grease a pudding bowl with butter, add the mixture, and waterproof the bowl by wrapping it in layers of plastic wrap.
    • Place the pudding bowl in a saucepan, add water to reach 2 cm below the bowl’s rim. Cover with foil, bring to boil, and simmer for 4 hours. Check doneness with a skewer. Once done, cool to room temperature, rewrap, and store in a cool place or the fridge.
    • For brandy custard, heat cream with vanilla. Whisk egg yolks, sugar, corn flour; combine with some cream. Gradually mix, cook for 10 mints to thicken. Strain, cool, add brandy before serving.
    • To serve, steam pudding 30 mints, serve with warm brandy custard.

    Chocolate Ripple Cake Trifle

    The chocolate ripple cake trifle melds textures and flavors by uniting chocolate ripple biscuits’ nostalgia with the elegance of a classic trifle. This masterpiece embodies indulgence and artistic flair. Chocolate ripple biscuits, beloved for their simple cocoa-rich taste, are transformed into a culinary marvel in this dessert. It elevates an everyday treat into a centerpiece for special occasions and celebrations. Central to the trifle is the art of layering. Every element harmonizes visually and taste-wise. Softened biscuits blend with cream, custard, or fillings, preserving their crunch while imparting moisture. Chocolate ripple cake.

    Ingredients:

    • Chocolate custard
    • Whipped cream
    • Chocolate shavings or grated chocolate

    Method:

    • Prepare chocolate ripple cake as directed (from recipe or package). For store-bought, layer ripple biscuits with cream; for homemade, use soaked chocolate biscuits.
    • Make/buy chocolate custard, ensuring a smooth, rich match to the cake.
    • In a trifle bowl or glasses, start with cake layer.
    • Add chocolate custard evenly.
    • Layer whipped cream for a light, creamy contrast.
    • Alternate cake, custard, and cream layers for desired depth.
    • Top with ample whipped cream.
    • Sprinkle chocolate shavings for decoration and flavor boost.
    • Chill trifle to meld flavors and set layers.
    • Serve chilled, relishing the combined textures and flavors.

    Conclusion:

    In conclusion, Australian Christmas desserts embody the country’s unique approach to the festive season, combining traditional elements with local flavors and a touch of creativity. Whether you’re savoring the ethereal beauty of the Christmas Pavlova, indulging in the heartwarming Plum Pudding with Brandy Custard, or relishing the playful charm of the Chocolate Ripple Cake Trifle, these desserts capture the essence of an Australian Christmas—where warmth, togetherness, and culinary delights come together to create cherished memories.